Initial Setup (Connecting Supabase)
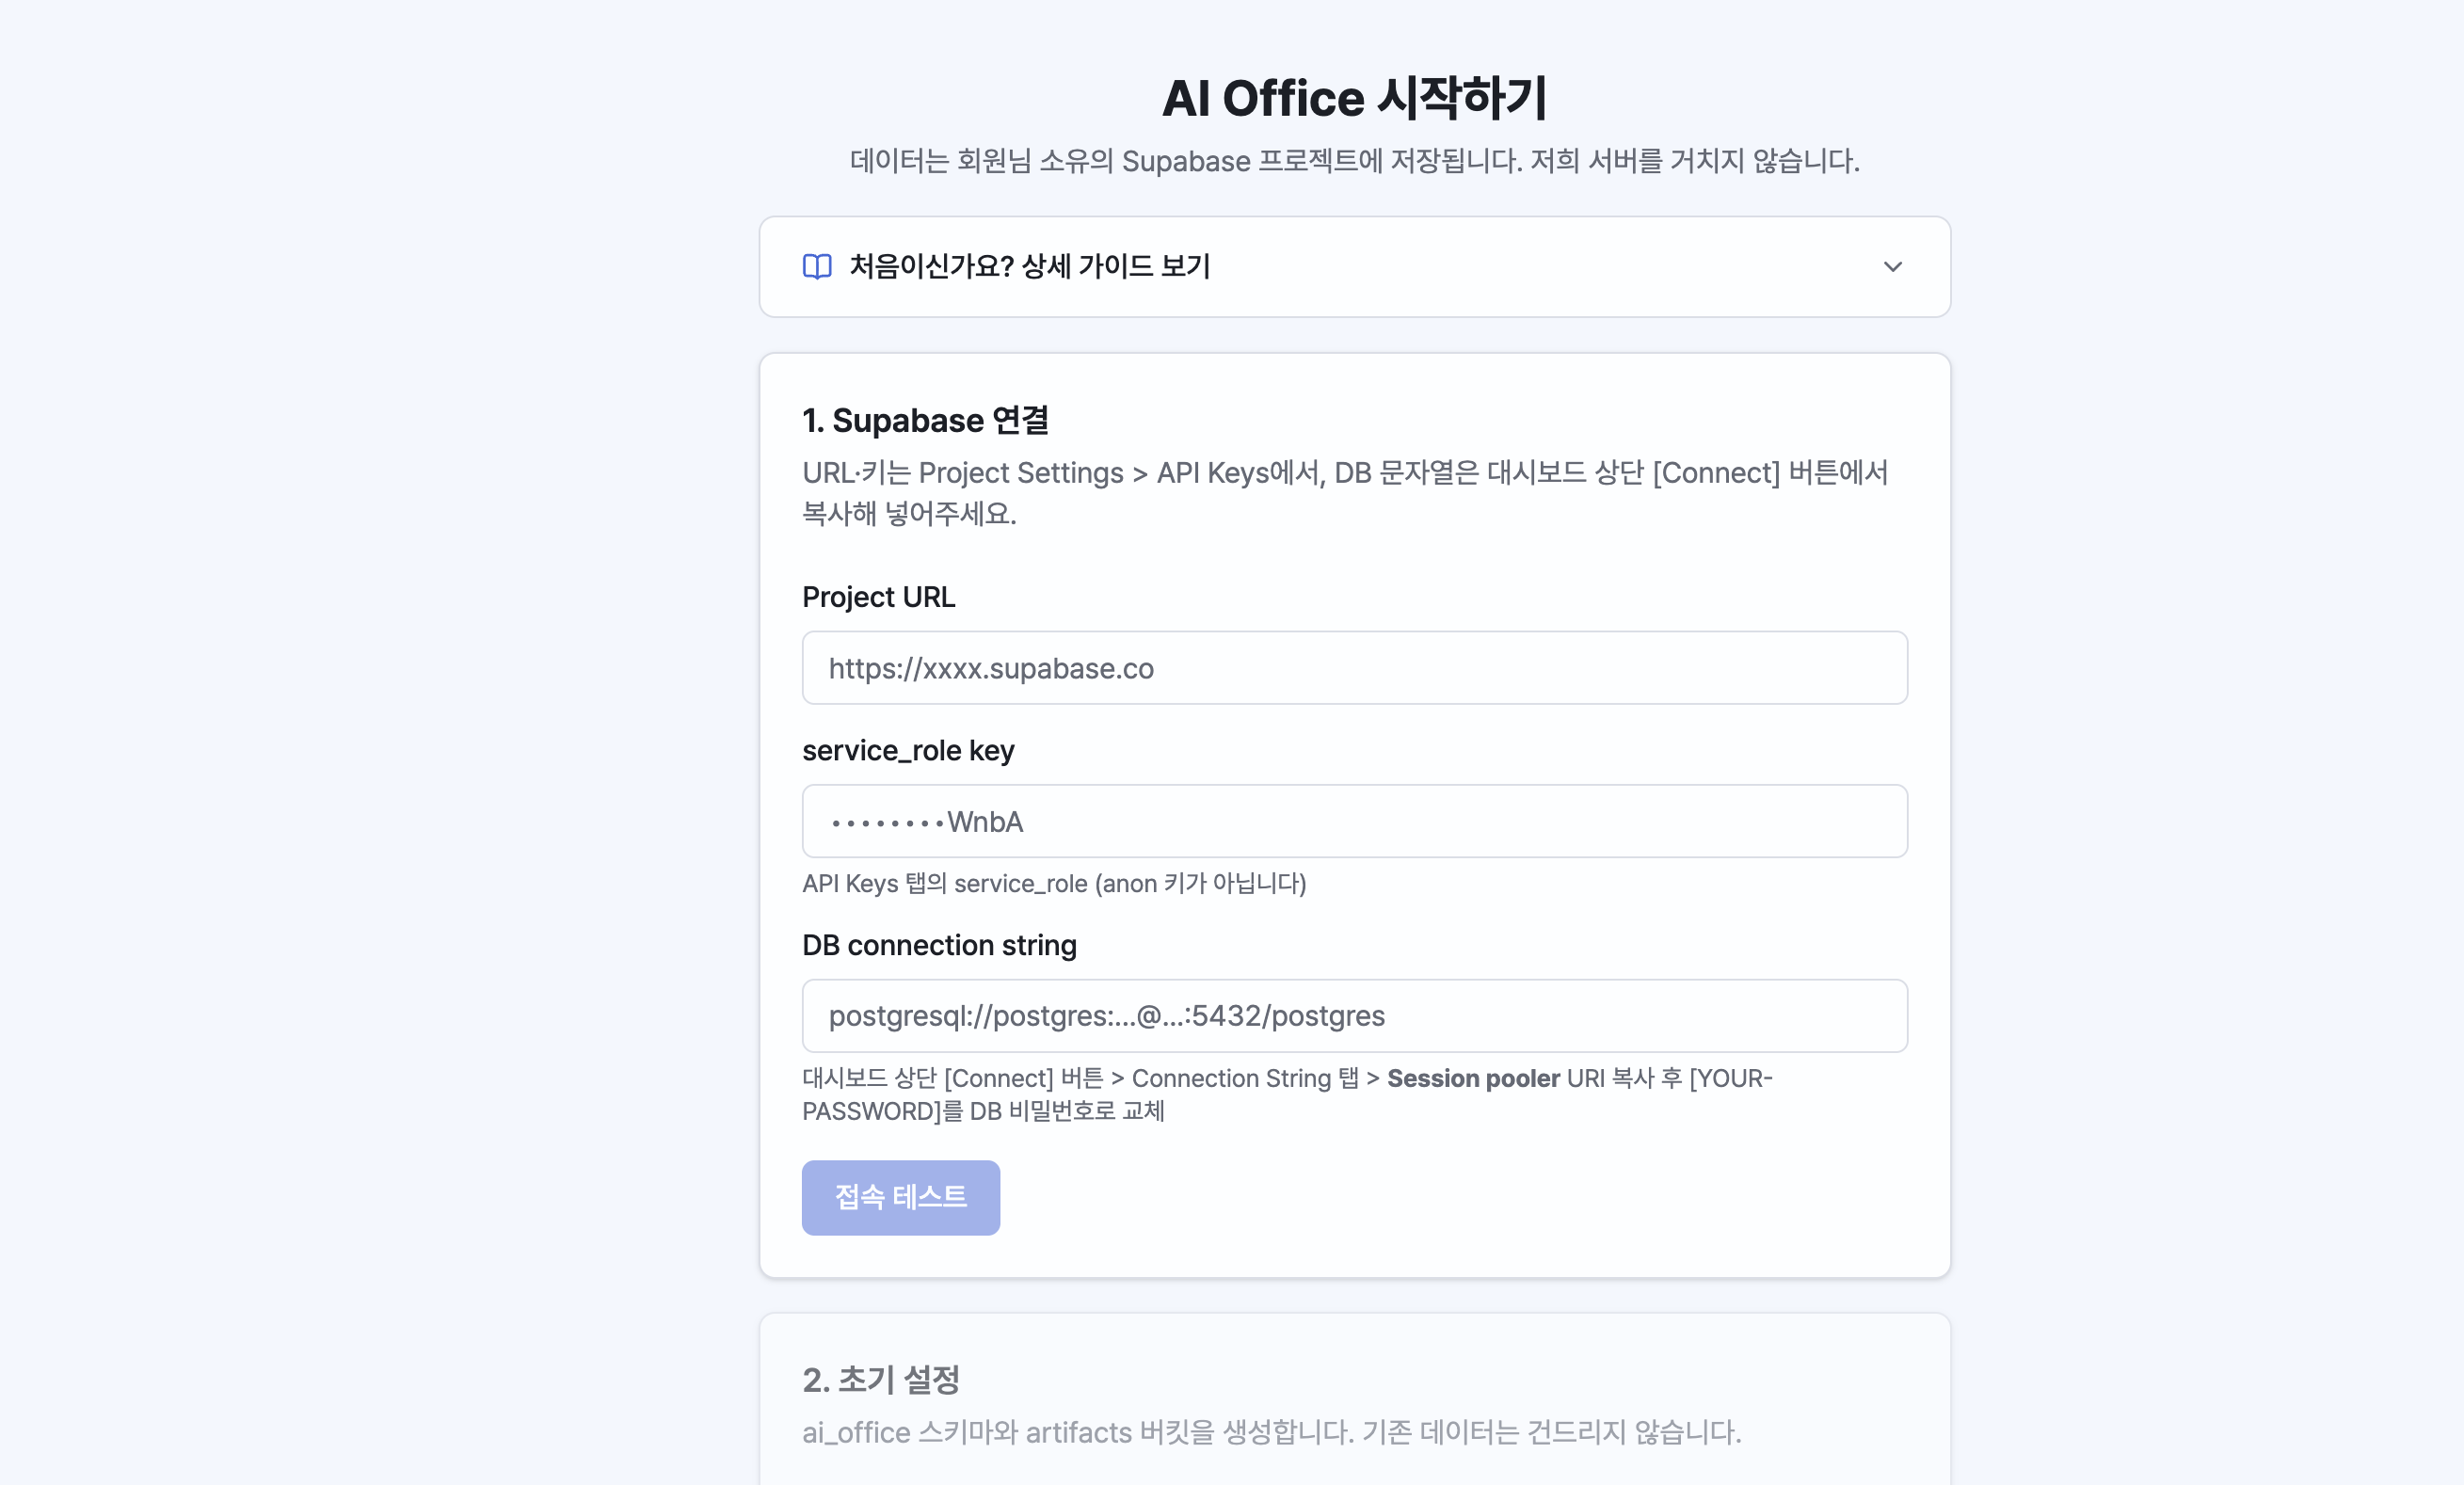
When you launch the app for the first time, you'll walk through the initial setup step by step (about 3 minutes).
Choose a Language
Choose between Korean and English. You can change this later in Settings > General. (If you select English, the interface is displayed in English through a real-time translation layer.)
Connect Supabase — Your Data in Your Own DB
Humant does not run its own server, so you connect your own Supabase project as the data store. You'll need three values — the Project URL, the service_role key, and the DB connection string — all taken from your Supabase dashboard.
The connection details you enter are stored encrypted in your OS secure storage on this computer and are never sent to any external server.
Step 1. Create a Supabase Project (Free)
Sign up at supabase.com and create a project with [New project].
- You set the Database Password here — you'll need it again in Step 4, so keep it safe. Using letters and numbers only makes things easier later (special characters can break the connection string).
- Pick a nearby Region (e.g. Northeast Asia — Seoul).
- After creation, the project takes 1–2 minutes to become ready.
The free plan is plenty. Note that free projects are paused after a week of inactivity (restore them from the dashboard with Restore).
Step 2. Copy the Project URL
Click the gear (⚙) at the bottom left of the dashboard → copy the Project URL from Project Settings > Data API.
- Format:
https://YOUR-PROJECT-ID.supabase.co
Step 3. Copy the service_role Key
In Project Settings > API Keys, click [Reveal] on the service_role key and copy it. In the new dashboard it may be under the Legacy API Keys tab.
- This is not the anon (public) key. The anon key lacks the permissions needed for initial setup and will fail.
- This key is stored encrypted only in your OS secure storage on this computer and is never sent to any external server.
Step 4. Copy the DB Connection String (The Most Confusing Step)
Click the [Connect] button at the top of the dashboard → in the Connection String tab, select Session pooler as the method and copy the URI.
- Format:
postgresql://postgres.YOUR-PROJECT-ID:[YOUR-PASSWORD]@aws-0-….pooler.supabase.com:5432/postgres - Delete [YOUR-PASSWORD] including the brackets and replace it with the DB password you set in Step 1.
- The default choice, Direct connection (
db.….supabase.co), is IPv6-only and won't connect on most networks. Be sure to pick Session pooler. - If your password contains special characters, they must be percent-encoded:
@→%40#→%23/→%2F:→%3A - If you forgot your password, reset it under Project Settings > Database > Reset database password.
Step 5. Test the Connection → Run Initial Setup
Enter the three values and once [Test Connection] passes, click [Run Initial Setup].
The app creates an ai_office schema (employee and mission data) and an artifacts bucket (deliverables backup) inside your Supabase.
The app never touches anything outside the
ai_officeschema in your Supabase. It stays safely separated from your existing data, and you can undo it anytime from Settings > Connection.
Common Errors
| Symptom | Cause and fix |
|---|---|
| "Host not found (attempted host: db.…)" | You pasted the Direct connection URI. Switch to the Session pooler URI. |
| The attempted host shows a garbled string | Special characters in your password broke the URI. Percent-encode them or reset the password. |
| "Authentication failed" | The DB password is wrong, or you entered the anon key. Make sure it's the service_role key. |
| "Cannot connect to the network" | Check your internet connection, and check the dashboard to make sure a free project isn't paused. |
Managing the Connection (Settings > Connection)
Once connected, you can check and manage the current state in Settings > Connection. Connection details are shown masked and never displayed in full.
- Change connection details — re-enter the Project URL, key, and connection string
- Test connection — check the current connection status
- Export / Import — for moving the connection when reinstalling the app. The backup file is encrypted with a password you enter.
Even after reinstalling and importing/reconnecting, your existing data and tables are never deleted — only the necessary updates are applied on top. (If the "schema version" on screen differs from the app's, updates are applied automatically.)
Undo Initialization
[Undo Initialization] in Settings > Connection deletes the ai_office schema. All employee, mission, and deliverable records will be lost, so use with care. Other data in your Supabase and your local files are untouched.
License
Activate your license by following the license instructions (this may vary depending on how the app was distributed). You can check the status in Settings > License.